Upload and Import Using Drag & Drop (Collections Module)
Drag & drop can be used to upload and import files directly from the computer’s file manager into the main- or detail view of the Collections module within the browser or the desktop app.
Note: Drag & drop only possible using a desktop web browser or the 4ALLPORTAL - Desktop App.

Example: Drag&Drop into the detail view of a collection
Upload and upload folder for collections
To be able to upload and import into a collection requires authorization for file uploads. File upload is set to “Allow” by default when you create a new collection.
Assigning an upload folder from the Files module Files Module is optional. If no upload folder is assigned, a selection window will open during the upload process. If an upload folder has already been assigned, the files will be uploaded to that folder and no selection is possible.
Tip: Determine an upload folder for the collection so that other participants will always import their files into the folder of your choice.
- Select the files using your computer’s file manager.
- Drag the selected files from the file manager to the main- or detail view of the Collection module in your browser or desktop app, pressing and holding the left-hand mouse button.
- The drag & drop area for depositing the files will be outlined in the main view.
- Once you release the mouse button – leaving the cursor within the drag & drop area – either the file upload will start, assuming that a “Role-Based Upload Folder and Upload Handling” has been set for you, or you can select an upload folder before the upload.
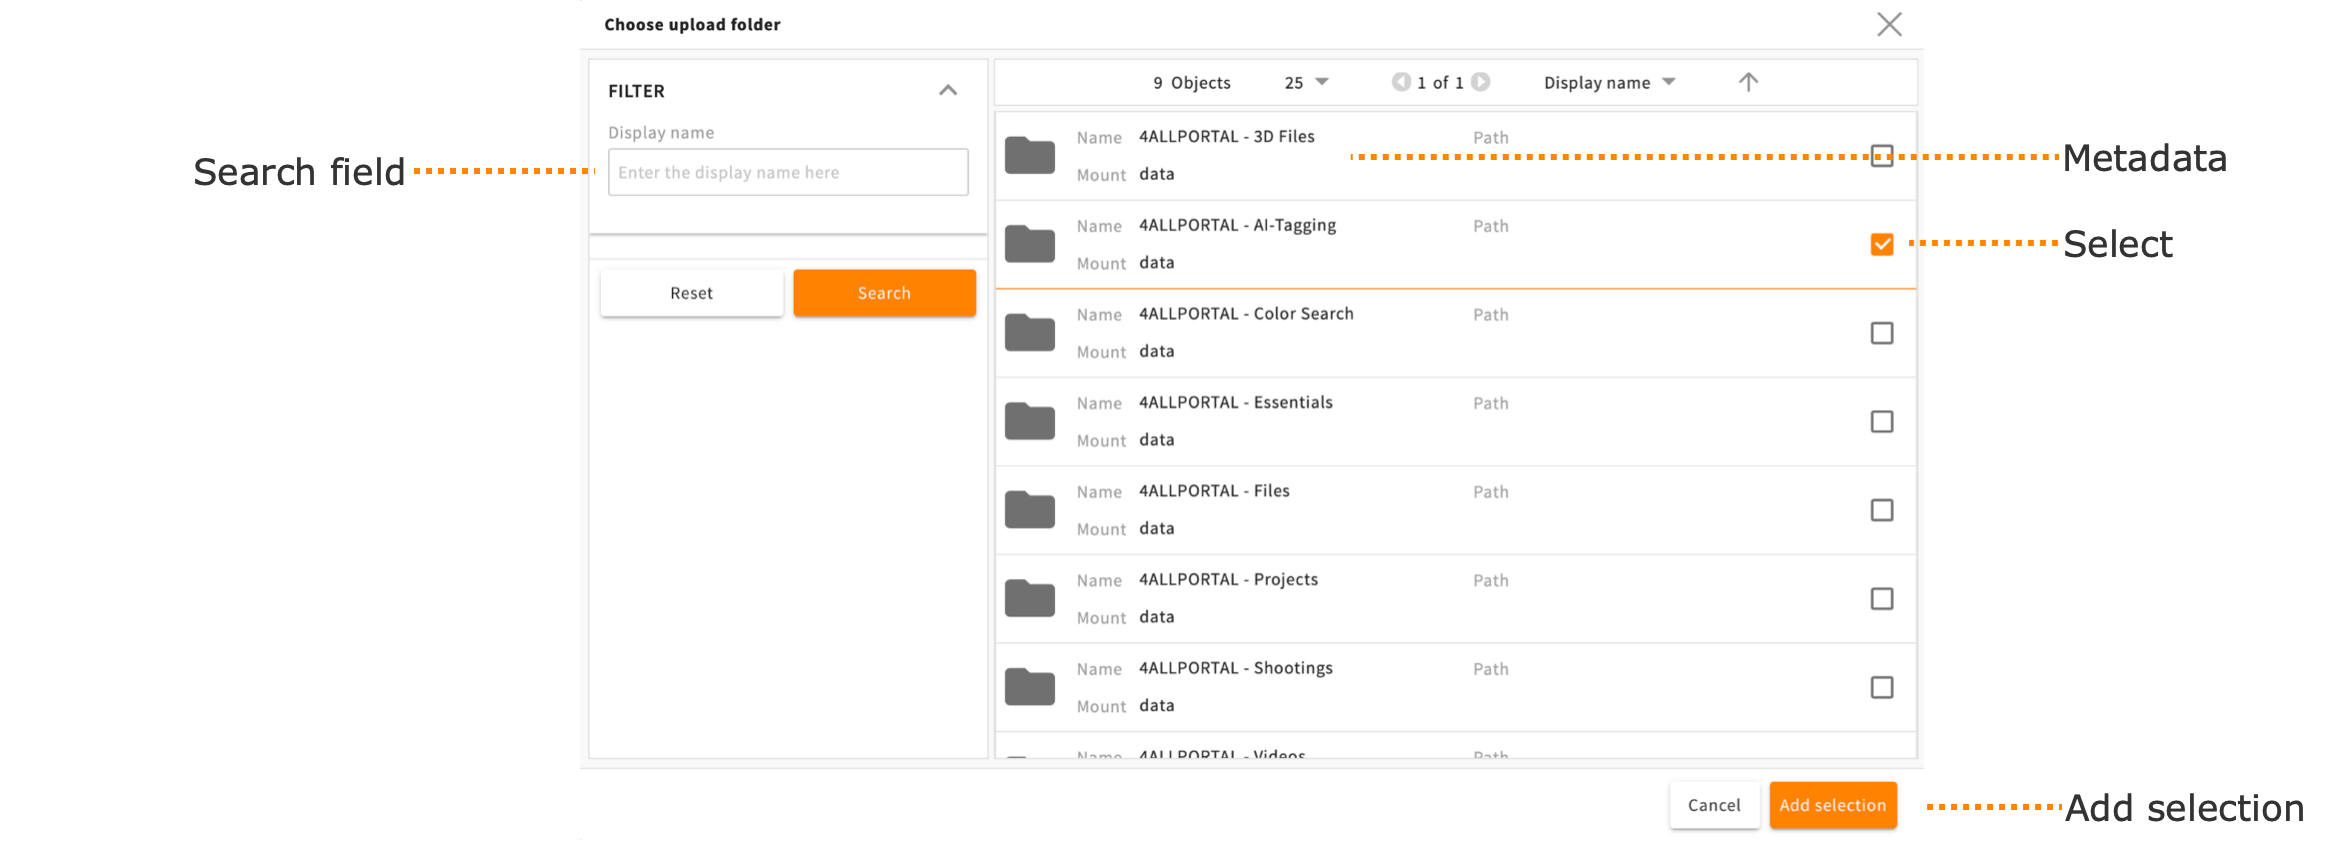
- If the selection window for choosing an upload folder opens, you can select an upload folder by clicking on the relevant checkbox.
Then click on the “Add selection” button to start the upload.
- The system will now perform the upload and import operation in the background.
- At the bottom right, in the footer of the user interface, you will see a status display showing the progress of the upload and import operation.

- Using the Import Manager, you can intervene in the ongoing upload and import operation.
To do so, click on the status display at the bottom right in the footer during the course of the operation.
For further details, see chapter “Import Manager”. - If “Import tagging” is active for the upload folder, you will be requested to tag the relevant metadata fields during the course of the operation.

Example: Import Tagging - If the upload folder already contains files with identical file names, you will be offered several options on how to proceed with the import involving existing files.
For further details, see chapter “Upload Handling in Case of Existing Files”.
Example: Selection options in case of existing files - The system will display a notification once the upload and import operation has been completed successfully.
- If necessary, click on the “Search” button to refresh the main view.
Note: Depending on the data volume, the import will continue to be performed as a background operation. It may take a while for the generation of previews and/or metadata to be completed in full.
To check progress, refresh the main view once again.