Create a new collection with files selected from the Files module.


  1. Open the “Files” module.

  2. Select files.

  3. Click the “Create new collection” icon in the toolbox to prepare the new collection.

  4. Enter the properties of the collection into the fields and click on button “Continue”.

  5. Invite participants to your collection, if necessary. Assign certain collection permissions to the participants for collaborating on the shared collection. Participants may, for instance, be authorized to edit the collection properties, add files to the collection, etc.

    You can find further information in chapter Collection Permissions for Participants.


    You can invite individual users or all users with a particular user role. The procedure is as described in section “Create New Collection”.


    Example: Users have been added to a new collection


  6. To complete the operation, click the “Create” button or the “Create and open” button if you wish to open the collection straightaway.


Marker Modul_Sammlungen_Erstellen_mit_Dateien_DE

Example: Collection properties as per section 4

1. Collection Name

Enter a meaningful name for the collection.

This is a mandatory field.


Note: To ensure optimum readability in the system, we recommend a maximum name length of approximately 40 characters.


2. Collection Description

Enter a description of your choice for the collection.

You can enter line breaks in the input field.


Note: To ensure optimum readability of the description in the system, we recommend a maximum length of approximately 500 characters (without line breaks).


3. Period of Validity

Enter a period of validity for the collection.

These dates do not affect the 4ALLPORTAL functions. They are only for organizational purposes, for instance to replicate the start and end date of a project phase.


4. Allow uploads

Activate the “Allow uploads” toggle switch to enable yourself and the collection participants to upload files directly into the collection.


You can find further information in chapter “Upload and Import Using Drag & Drop” (Collections Module).


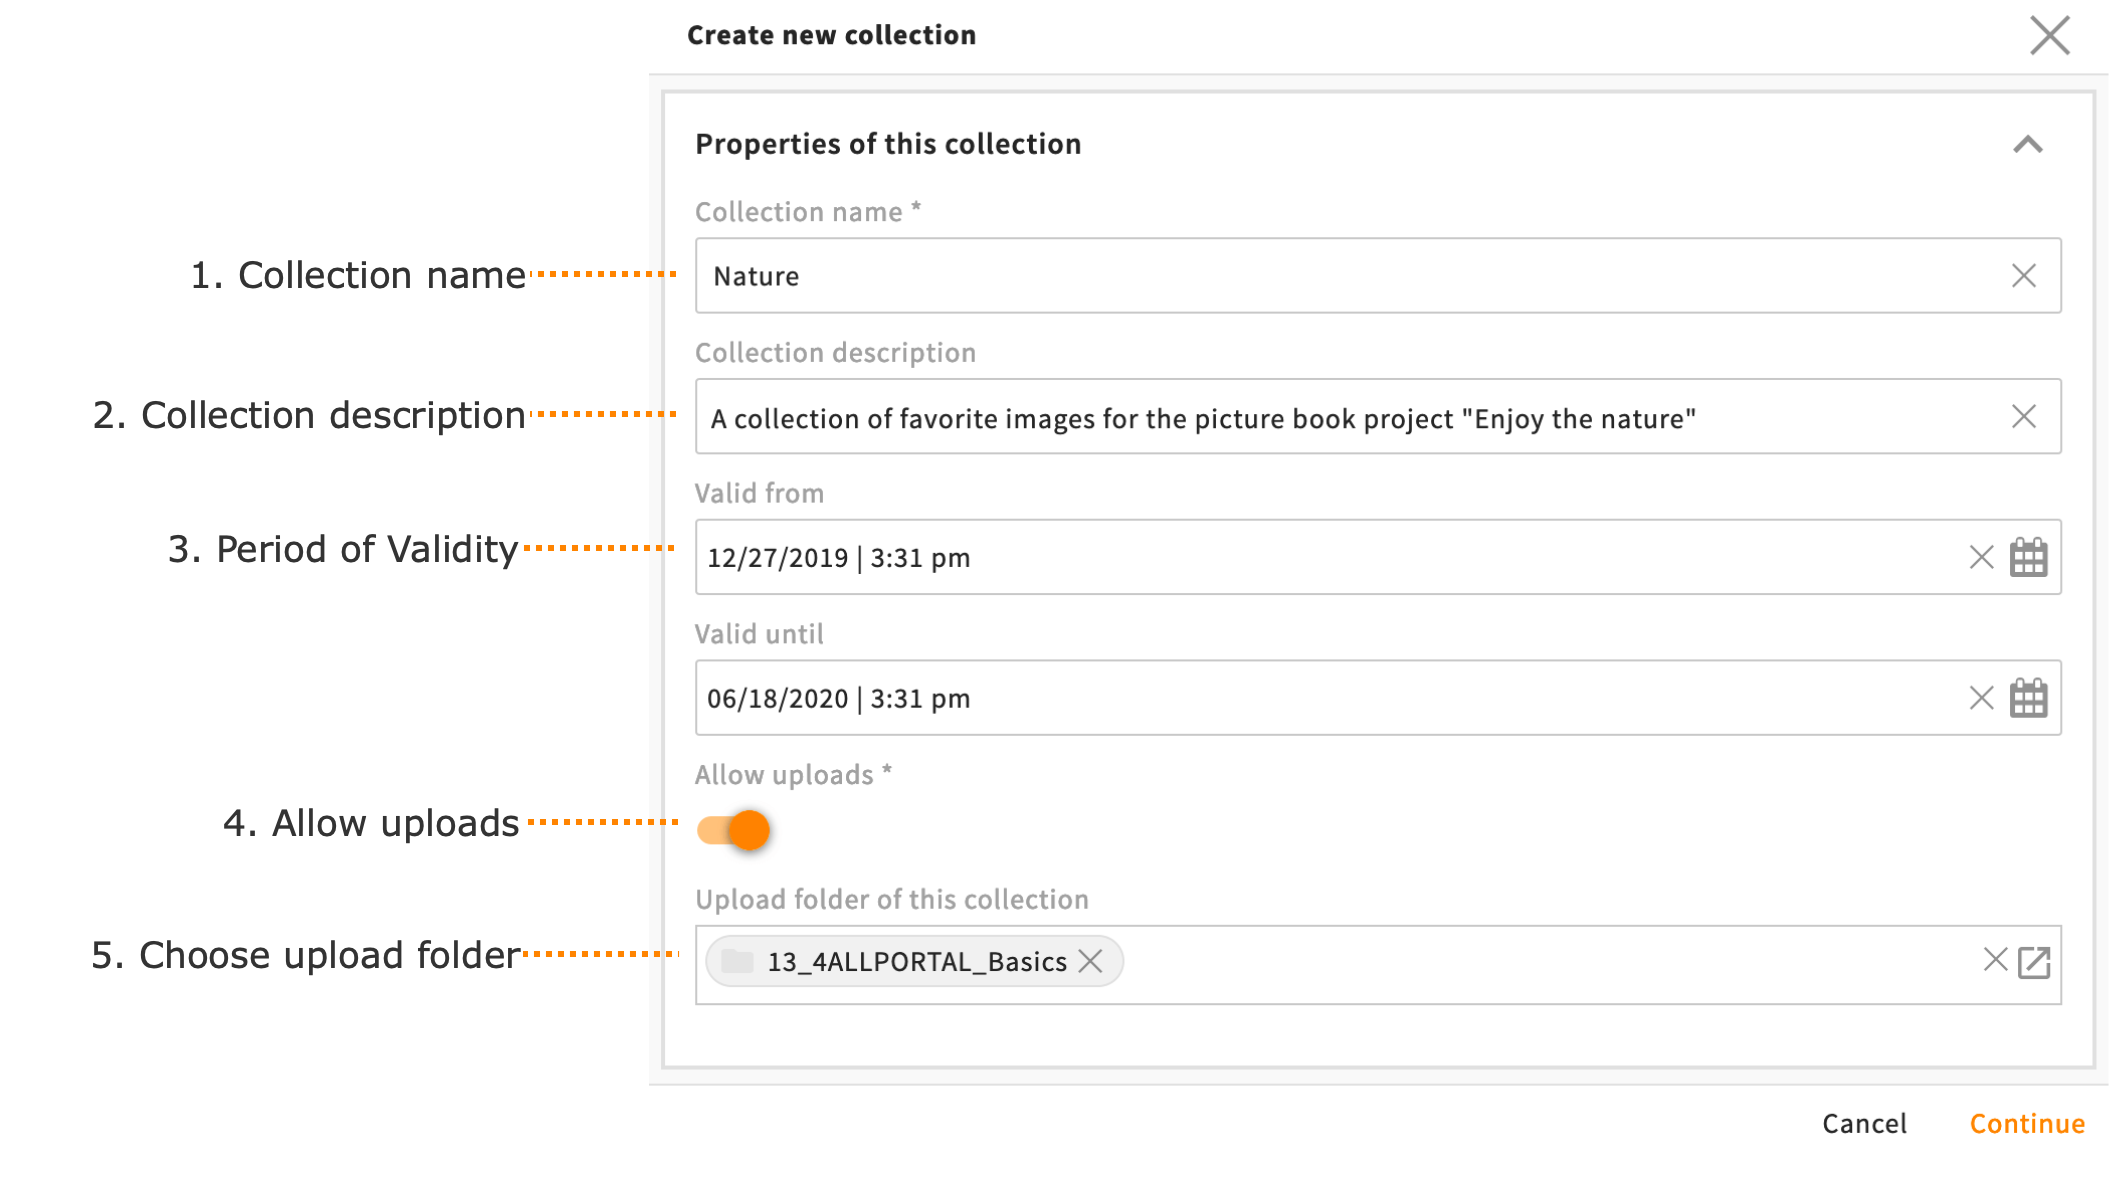
5. Choose upload folder

When uploading files into a collection, you or the participants can freely select an upload folder where the files are to be saved. This may result in a disorderly uploading of files in various folders. 

To allow you to better organize the uploading of files for a collection, it is possible to assign a fixed upload folder to the collection. If this is done, there will be no option offered for selecting an upload folder when uploading files and the files will be saved in your specified folder.