Connecting the InDesign Plugin with the 4ALLPORTAL
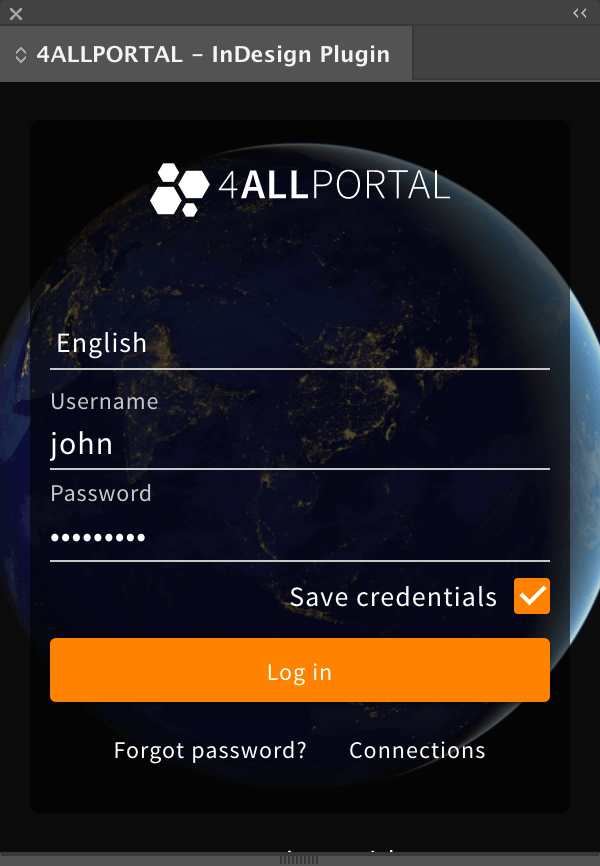
Setting up the connection data is essential for communication between the InDesign plugin and the 4ALLPORTAL. Once the connection has been established, you have to log in with your 4ALLPORTAL user details (username and password) to use the plugin.
Contents
Connection data
You need the URL and a network drive mapping of your 4ALLPORTAL.
You can use the same URL you use to launch the system via your browser.
For example: http(s)://YOUR-4ALLPORTAL-URL
You need network drive mapping to connect directly to the root directory of the 4ALLPORTAL, where the InDesign plugin looks where your DAM files actually are. This is the only way InDesign can create links from images etc. from the 4ALLPORTAL to an InDesign document.
How does it work?
A direct connection to the 4ALLPORTAL and the files must be established on your computer. This network drive will appear next to your other drives. It must be set up in a way it leads you directly to the "data" folder in the root directory of your 4ALLPORTAL. If clicking this network drive shows you the same folder structure you see in the structure tree of the 4ALLPORTAL itself, the network drive is mapped correctly and the plugin can access the files located there.
IMPORTANT: Mapping network drives is not a function of the 4ALLPORTAL. It requires in-house access details and access rights and is therefore not explained in these instructions. If you do not have information on how you link the network drive to your 4ALLPORTAL system, please contact your company’s IT department.
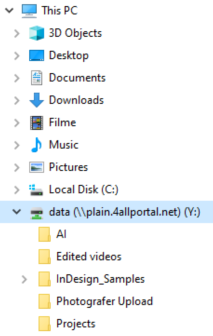
Example: The 4ALLPORTAL root directory mapped locally on the computer as a network drive
Redirect for different root directory
The mounting point for finding the files is always the "data" folder, which is usually also the root directory for network mapping. Here the plugin expects the file ".4apmount" and your files and folders on the top level. If "data" is a subfolder within your root directory, the plugin must be given the actual location of ".4apmount" and "data" for mounting.
For this, put the file ".4apmount_redirect" into your root directory and specify the actual location of ".4apmount" and "data": path={DESIRED PATH}/.
Any subfolder depth is possible.
Please note: The redirect file does not replace the actual mount file ".4apmount", which must still be stored in "data".
Example 1 – no redirect necessary
data (root directory & mount point for plugin)
- .4apmount
- files and folders of DAM
Example 2 – redirect necessary
Example server (root directory)
- .4apmount_redirect
- data (mount point for plugin)
- .4apmount
- files and folders of DAM
- some other folders
Set up user data
- Start Adobe InDesign and open the InDesign plugin via the menu:
“Window → Extensions → 4ALLPORTAL – InDesign Plugin” - When you open the plugin on your computer for the first time, the connection menu appears because no links have been set up yet.
- Click on the “+” icon to create a new link.
- It is possible to set up several connections and switch between those. You should therefore enter a descriptive title in the “New link” field.
- Enter the full URL of your 4ALLPORTAL in the “URL to the target system” field.
- Click on the “Disk” icon to save the connection.
- Click on the “Radio” button in front of the fields to activate the connection. You could now also set up additional connections if you own several 4ALLPORTAL systems.
- Only when the connection is active can you close the connection menu by clicking on the “Next” button and switch to the login screen.
Connection menu
With the connection menu, you can create additional connections if you use more than one 4ALLPORTAL system, activate connectios for use, and edit or delete connections.
- Start the InDesign plugin and open the links menu by clicking on the “Connections” button on the login screen.
Example: “Connections” button under the “Login” button - The connection menu shows you all the available links and which link is active.
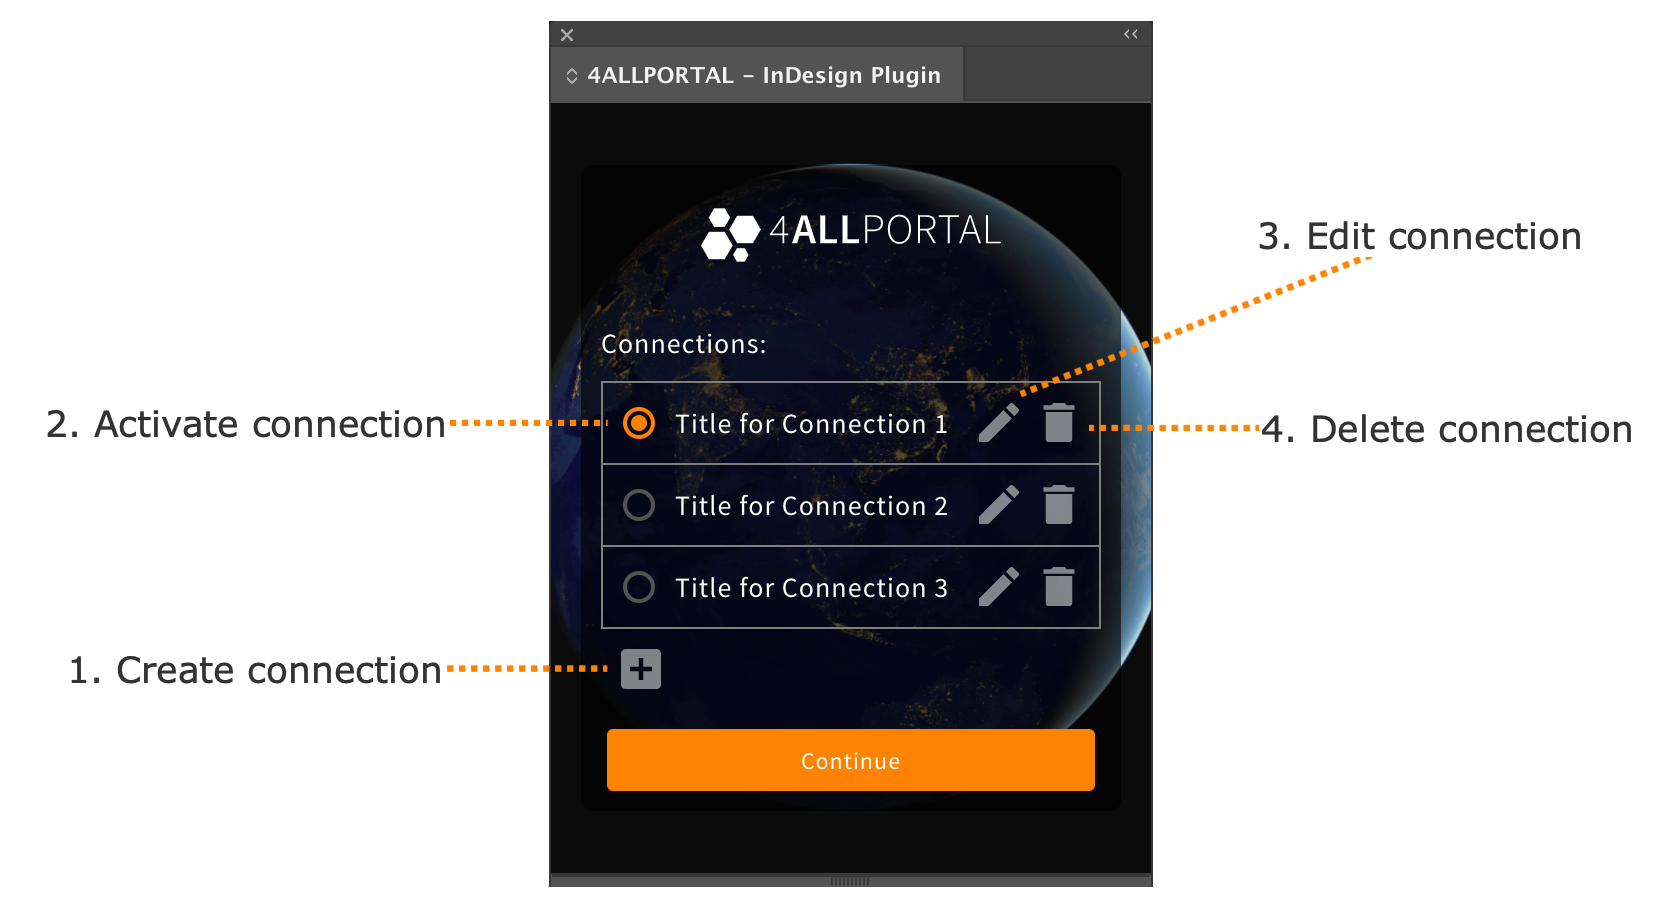
1. Create connection
Click on the “Plus” icon to create an additional connection.
2. Activate connection
Click on the “Radio” button to activate a link. If the button is orange, the connection is active.
3. Edit connection
Click on the “Pen” icon to edit the title or the URL for a connection. Then click the “Disk” icon to save the change.
4. Delete connection
Click on the “Recycle bin” icon to permanently delete a connection. You must click the confirmation message to carry out the deletion.